You guys! This is an idea that I’ve had in my head for months and I’m so excited to finally share it – my Pimms Cup Ice Cream Float! Here in Australia we call this kind of drink a ‘Spider’, but no matter what you call it, it’s delicious. I even re-shot the photos this weekend because the first attempt didn’t do justice to how fun this drink is. And maybe I just wanted to test it again, to make sure it was really good.
Spoiler alert, it is.
The main components are a fizzy, carbonated soda or soft drink and a big scoop of ice cream. Two ingredients, it couldn’t be easier! There is definitely an element of childhood nostalgia with this drink. I used to love drinking spiders with creaming soda and vanilla ice cream. This version is grown up with a boozy twist!
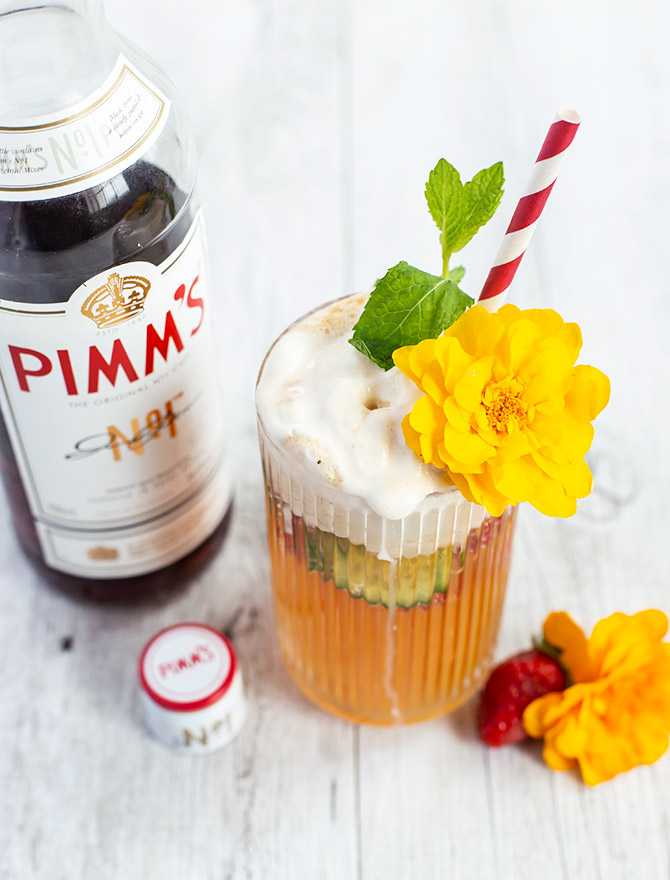
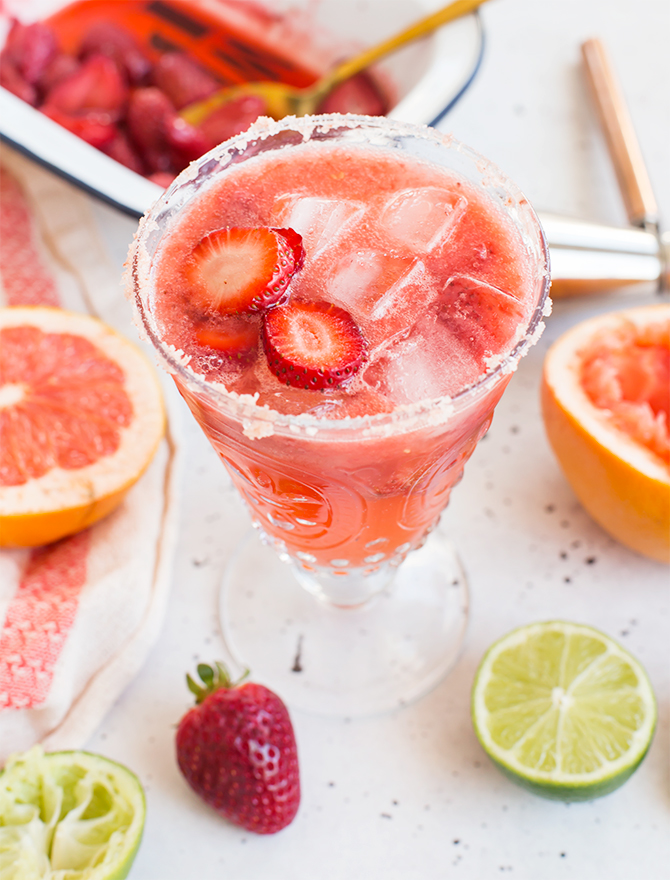
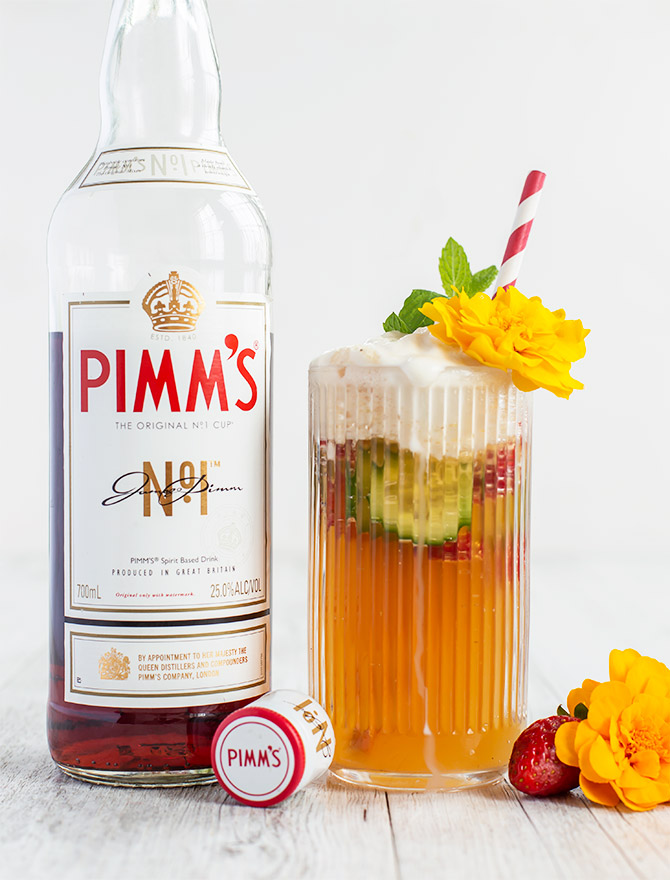
It’s no secret that I love Pimm’s in any form – from drinks to pies. It’s a deliciously drinkable gin-based aperitif created in 1841. Pimm’s is typically served as a pitcher cocktail with sliced cucumber, strawberries, lemon and lemonade or ginger ale.
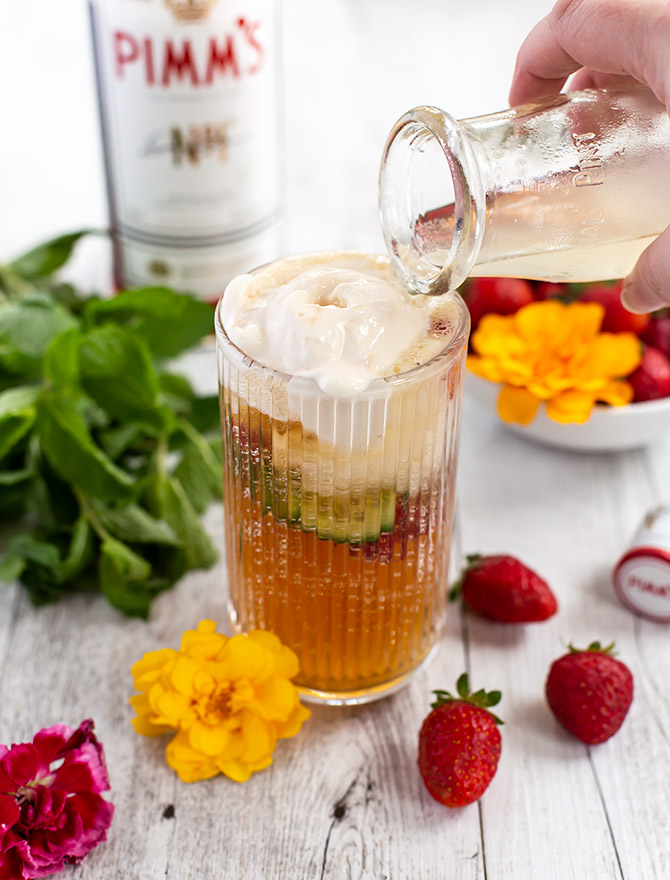
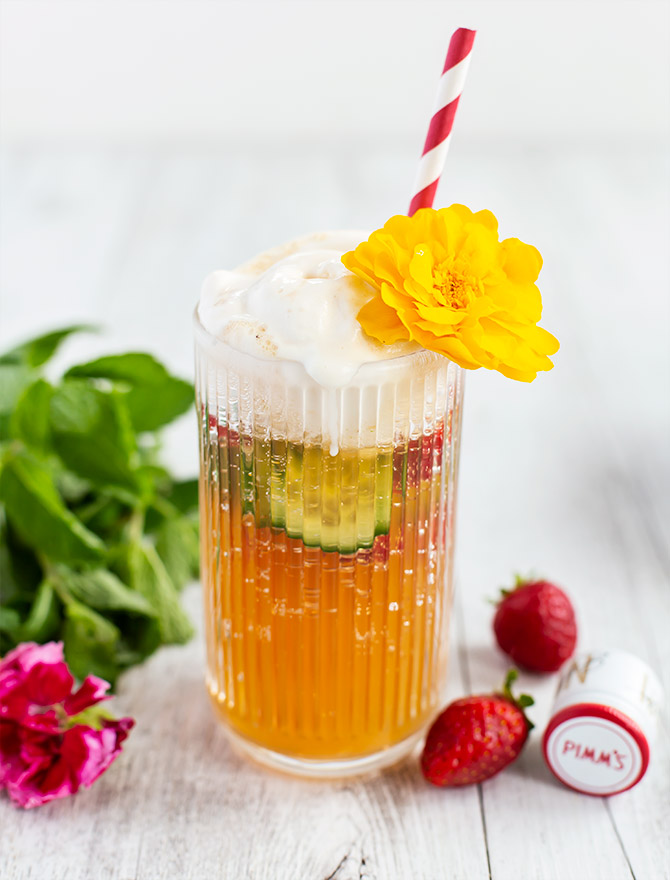
But I went one step further and added a big scoop of ice cream. It fizzes up theatrically and creates a creamy foam on top. The result is kind of like a creamy, boozy milkshake. It’s a cocktail and a dessert all in the one glass! I love boozy desserts and dessert inspired cocktails, so this ticks all the boxes for me.
Traditionally vanilla ice cream is the most common flavour used in spiders and floats. I used salted caramel flavour for my version. It worked really well with the flavour of the ginger beer and turned out delicious. You could try a strawberry or peach gelato. Or if you prefer a dairy-free version, any kind of sorbet would also work – lemon would be yum!
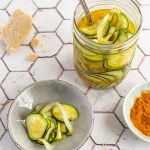
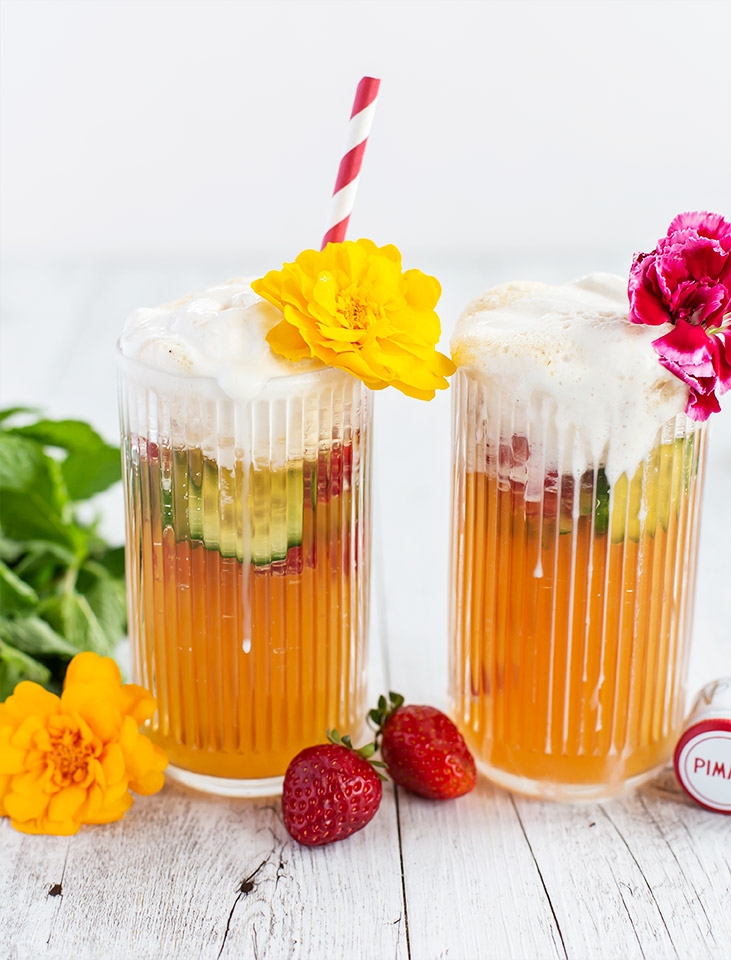
Feel free to add your favourite Pimm’s fruit fixings to the glass before you add the ice cream. I used the traditional sliced strawberries and cucumbers, but I’ve also seen versions with apple or orange slices, pomegranate and other berries. If you were feeling really fancy you could make this a ‘Royal’ Pimms Float using champagne instead of ginger beer. A sparkling Rosé could also be nice! Or maybe even a kombucha?
This Pimm’s Ice Cream Float is the perfect drink for a warm afternoon. It would be great to share with friends or serve at a BBQ, pool party or boozy brunch before the warm weather ends. Drinking Pimm’s always reminds me of my best girl friends and good times and I will definitely keep experimenting with it in drinks and desserts for many years to come.
Related Post: The Garden Party Cocktail

Pimm’s Cup ‘Spider’ Ice Cream Float
This is my boozy, grown up take on a nostalgic childhood favourite. My Pimm’s Cup ‘Spider’ Ice Cream Float is like dessert in a glass and perfect for warm summer days.
Ingredients
- 6 strawberries, sliced
- 1/2 cucumber, sliced thinly
- 120 ml Pimm’s
- ginger beer (I like Bundaberg)
- 2 scoops ice cream (I used salted caramel)
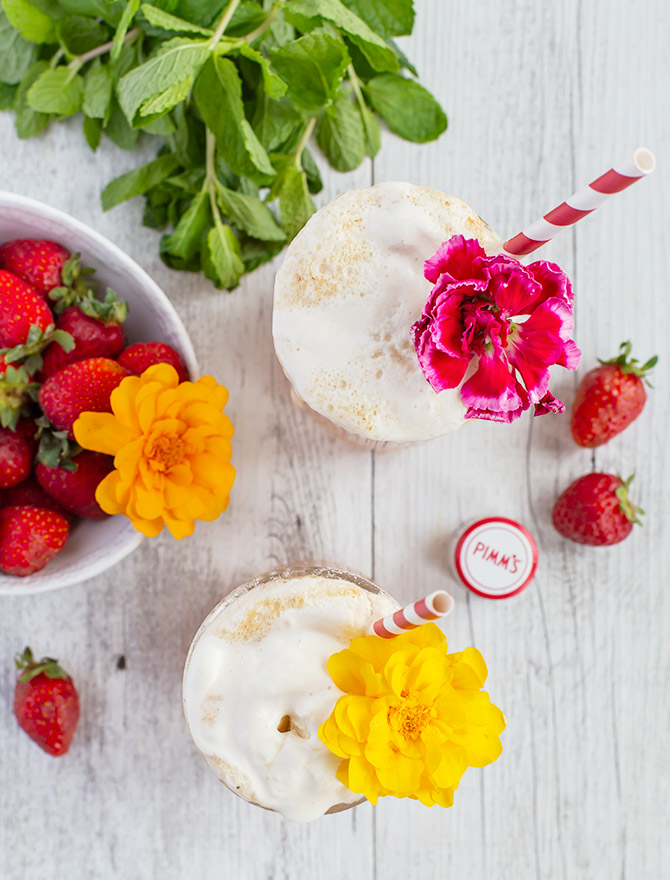
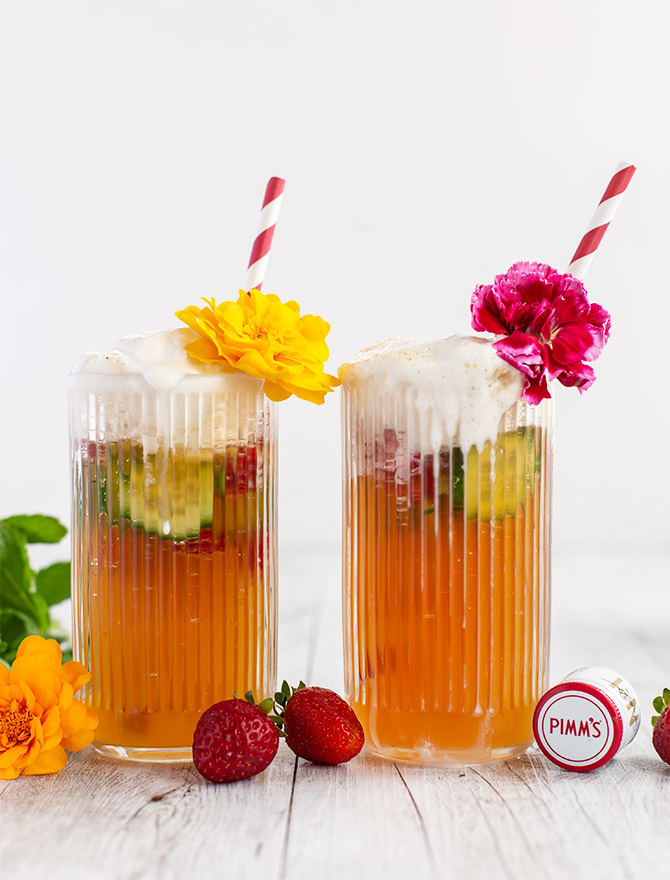
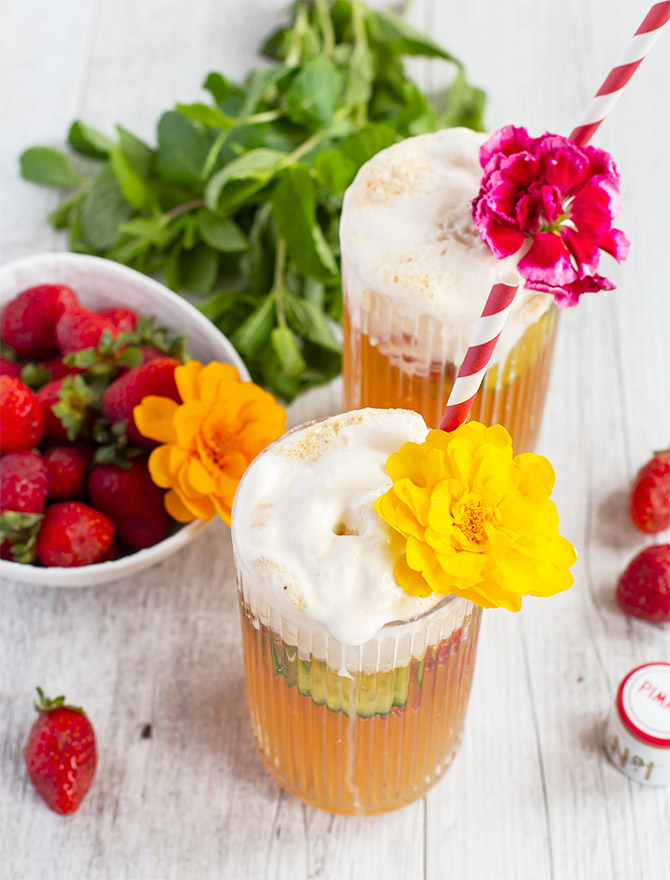
- Fresh mint & edible flowers (optional, to serve)
Instructions
-
Add the sliced strawberries and cucumbers to the bottom of 2 tall glasses. Add 60ml Pimm’s to each glass.
-
Top glasses up to three quarters full with ginger beer. Add a scoop of ice cream and top up a little more with extra ginger beer.
-
Serve immediately with a straw and optional fresh mint and flowers.